If you’re installing a flammables storage cabinet, you’re usually doing it for one reason: you need to store enough flammable liquids to run the job, without turning your work area into the easiest ignition point in the building.
Most inspection failures aren’t exotic. They’re basic layout and setup mistakes: the cabinet ends up in an egress path, too close to heat or sparks, vent plugs get left open, or people transfer solvent without bonding and grounding.
This guide is written for the decision stage — you already have the cabinet (or it’s arriving soon). We’ll cover how to position it, how to install it so it stays closed and stable, and how to set it up so it actually reduces risk.
⚠️ Warning: This article is practical guidance, not a substitute for your local fire code, your Authority Having Jurisdiction (AHJ), or the manufacturer’s manual. When local requirements are stricter than general guidance, local wins.
Before you start: what a compliant cabinet is supposed to do
A compliant cabinet is designed to buy time in a fire by keeping heat out long enough for evacuation and response.
In the U.S., the baseline requirements you’ll see referenced come from OSHA’s flammable liquids standard. For example, OSHA’s 29 CFR 1910.106 cabinet construction language is commonly quoted and summarized by manufacturers and safety suppliers such as Justrite’s excerpt of OSHA 29 CFR 1910.106(d)(3)(ii)(a).
At a minimum, a flammables storage cabinet should:
- Be built and labeled as a flammable liquid storage cabinet (commonly “Flammable – Keep Fire Away”).
- Have spill containment at the bottom (often referenced as a 2-inch raised sill).
- Stay shut in a fire (doors fit, latch works, no warping).
- Keep you within allowable quantity limits for your fire area.
If you’re still deciding which cabinet style or size you need, start with Huanawell and their practical overview of safety storage cabinet regulations and standards so you can align your cabinet choice with how inspectors typically check these units.
Flammable storage cabinet installation: site survey and placement requirements
Input: the cabinet dimensions, your room layout, and where flammables are used/dispensed.
1. Confirm you’re not placing it in an egress route
This is the fastest way to fail a safety audit.
Wayne State University’s EHS guidance is blunt: their guidance on flammable storage cabinets states, “Do not place flammable storage cabinets in egress routes.”
Practical rule:
- If the cabinet narrows a corridor, blocks a doorway swing, or forces people to squeeze past it during evacuation, it’s in the wrong spot.
2. Identify ignition sources and “spark work” zones
Don’t put a cabinet where you already know sparks and heat happen:
- Welding, grinding, and cutting areas
- Hot work benches
- Ovens, heaters, hot pipes
- Areas where extension cords and temporary power are common
You’re not trying to hit a magic number of feet. You’re trying to keep flammable vapor and spill risk away from predictable ignition.
3. Think like a spill: where does liquid go if a container fails?
Even when the cabinet has a sump, spills happen during loading and transfer.
- Avoid locations where a spill would run directly toward a floor-level ignition source (motors, pumps, heaters).
- Avoid placing the cabinet where a spill would run into an occupied walkway.
Done when: you can point to a cabinet location that (a) does not affect evacuation routes, (b) is away from spark/heat work, and (c) doesn’t create an obvious spill-to-ignition path.
Flammable cabinet placement requirements you should verify with your AHJ
Codes and best-practice guidance tend to agree on the “don’ts” (don’t block egress, don’t put it near ignition sources), but the exact placement requirements can tighten up fast based on your local fire code, building type, sprinkler coverage, and insurance.
Use this quick set of checks before you lock the cabinet in place:
- Egress stays clear: nothing about the cabinet location narrows or obstructs a route people would use to get out.
- Ignition sources are controlled: don’t place it where hot work, heaters, or spark-producing equipment is routine.
- Spill path is reasonable: don’t create a straight-line spill route to motors, pumps, or other floor-level ignition sources.
- Access is workable: operators can open doors fully and retrieve containers without “standing in traffic.”
Step 2: confirm cabinet count and quantity limits before you “commit” the location
This is the part people forget: you can install the cabinet perfectly and still be out of compliance if you exceed maximum allowable quantities.
OSHA’s cabinet limits (commonly summarized in safety references) are typically:
- Up to 60 gallons of Category 1–3 flammable liquids per cabinet
- Up to 120 gallons of Category 4 liquids per cabinet
You’ll see these limits summarized in the compliance-style breakdown from US Made Supply’s OSHA 1910.106 cabinet rules.
Also watch cabinet count in a fire area. Many references repeat a common rule of thumb: no more than three cabinets in one fire area unless separated by distance (often stated as 100 feet). Confirm what your local code and AHJ require.
Done when: you have a rough inventory (what liquids, how much) and you know the cabinet location won’t create a “fourth cabinet in one area” situation later.
Step 3: position and level your flammables storage cabinet so the doors seal
A flammable storage cabinet only works as designed if the doors close and latch cleanly.
1. Use a stable, non-combustible surface
The cabinet should sit on a stable floor that won’t shift. Concrete is the usual default.
If your floor is uneven, don’t “solve” it with scrap wood shims that can compress or burn. Use proper leveling feet (if equipped) or non-combustible shimming methods per the manufacturer.
2. Level the cabinet front-to-back and side-to-side
This matters for two reasons:
- Doors: the latch and self-closing mechanism (if equipped) won’t behave correctly if the cabinet is twisted.
- Sump: a cabinet that leans can pool spills in a corner and reduce the effective containment depth.
Done when: the doors close without needing a slam, the latch engages fully, and the cabinet doesn’t rock when you push on the top corners.
Step 4: decide on anchoring (and do it the right way)
Not every facility requires a cabinet to be anchored. But many do — especially in seismic zones, high-traffic forklift areas, or where your internal safety policy requires tip resistance.
Anchoring rules are not universal. They can come from:
- Local building/fire code
- Your AHJ (fire marshal)
- The manufacturer’s manual
- Your facility risk assessment
Practical guidance:
- Do not drill random holes through cabinet walls. If you compromise the cabinet body, you can compromise fire performance.
- Use manufacturer-provided anchor points or approved anchoring methods.
Done when: the cabinet meets your local/plant anchoring requirement without modifying the cabinet beyond what the manufacturer allows.
Step 5: should flammable cabinets be vented? (usually no)
This is where a lot of well-meaning installs go wrong.
NFPA 30 is clear that ventilation is not required for fire protection, and it also warns that venting can compromise cabinet performance.
Labconco quotes and explains the key language in their article on solvent storage cabinets and NFPA 30 venting, including:
- NFPA 30 9.5.4: cabinets are not required to be vented for fire protection.
- NFPA 30 A.9.5.4: venting has not been demonstrated as necessary and is not recommended.
- NFPA 30 9.5.4.1: if not vented, openings should be sealed with the bungs supplied.

When venting might be required
Two common reasons:
- Your AHJ/local code requires it.
- Your industrial hygiene plan requires vapor control for your specific chemicals/process.
If you must vent, follow the manufacturer’s vent kit instructions and use fire-resistant materials and proper arrestors.
If you do not vent, tighten the bungs and keep them tight.
Done when: you can answer “Are the bungs installed and tight?” with a documented yes — or you can show the approved vent kit routing and AHJ acceptance.
Step 6: label it so it’s obvious in an emergency
Labeling isn’t decoration. It’s how a responder or a new operator knows what’s inside without guessing.
OSHA’s cabinet wording is typically shown as “Flammable – Keep Fire Away,” and Huanawell repeats this requirement clearly in their OSHA flammable cabinet rules guide.
Practical checklist:
- Label is on the front, visible with doors closed.
- Label isn’t covered by tape, notices, or grime.
Done when: you can see the label from the normal approach path to the cabinet.
Step 7: set up the inside so it stays safe after day one
The install is not finished when the cabinet is in place. It’s finished when the cabinet is loaded in a way that doesn’t create new hazards.
Wayne State’s EHS page also calls out several real-world issues that show up in inspections, including keeping cabinets in good condition and ensuring bungs are seated, doors close, and incompatible chemicals aren’t stored together.
1. Store compatible chemicals only
A flammable cabinet is not a “hazmat junk drawer.”
- Keep oxidizers out.
- Keep strong acids/bases out unless your SDS explicitly supports it and you have compatibility approval.
If you need multiple cabinet types, Huanawell’s broader guides on different cabinet categories can help you plan separation (for example, their complete guide to flammable cabinets).
2. Keep containers upright, sealed, and clean
- Lids tight.
- Containers clean on the outside (no residue).
- Don’t store leaking containers “temporarily.”
3. Don’t store combustibles in the cabinet
A common mistake is leaving cardboard packaging in the cabinet. It adds fuel load.
Done when: you can open the cabinet and see (a) compatible flammables only, (b) no cardboard/paper, (c) containers upright and intact, and (d) sump area clear.
Step 8: if you dispense from the cabinet, treat static as a real ignition source
Passive storage is one thing. Pouring and transferring is where people get hurt.
Grounding and bonding is about preventing a static spark from igniting vapors.
The University of Kentucky’s Research Safety group provides a practical, step-by-step procedure in their bonding and grounding guidance (including the reminders to ensure metal-to-metal contact and not to connect to fire sprinkler lines).
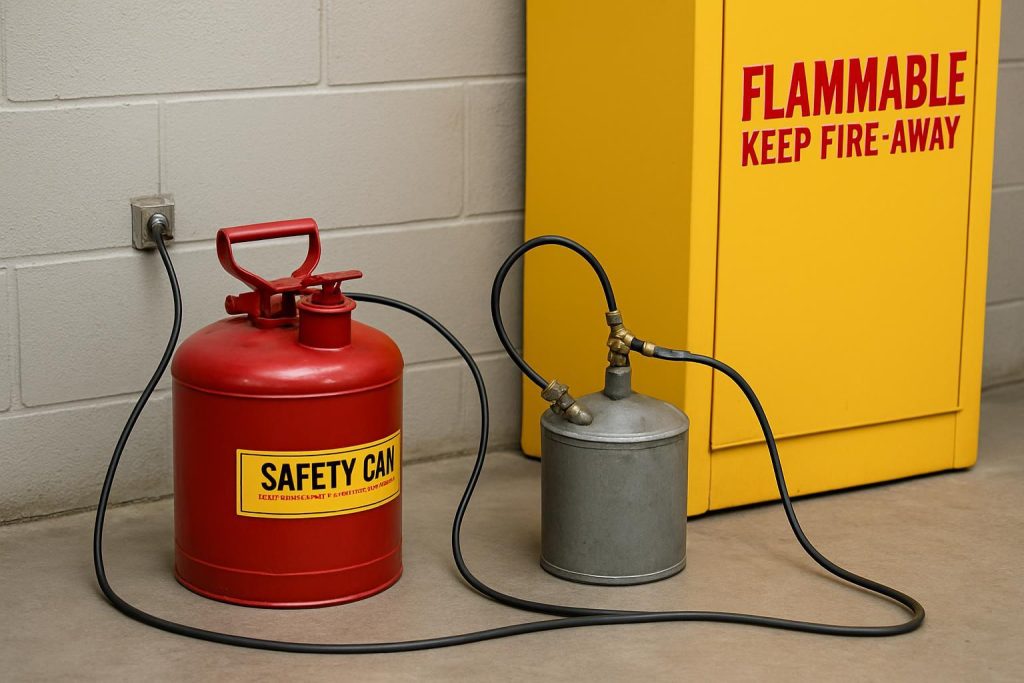
Minimum practical steps:
- Bond the dispensing and receiving containers together.
- Ground one container to an earth ground.
- Verify clamp points are bare metal (paint defeats the connection).
- Transfer slowly to reduce splashing.
Done when: the bonding/grounding kit is stored at the cabinet location (not “somewhere else”), and operators actually use it.
Step 9: final inspection checklist (print this and walk it)
Use this as a commissioning checklist after install and then as a monthly quick check.
Cabinet placement and access
- Cabinet is not in an egress route and does not narrow an exit path.
- Cabinet doors can open fully without blocking a walkway.
- Cabinet is away from obvious ignition sources and spark work zones.
Cabinet condition
- Cabinet is level; it does not rock.
- Doors close and latch fully every time.
- No holes, major dents, or modifications to cabinet walls.
Venting configuration
- Vent bungs are installed and tight (if not vented).
- If vented, vent kit is manufacturer-approved and routed to a safe location per AHJ.
Labeling and housekeeping
- “Flammable – Keep Fire Away” label is visible and readable.
- No cardboard or combustible storage inside.
- Sump area is clear (no standing liquid, no debris).
Inventory and segregation
- Stored quantities stay within cabinet and fire-area limits.
- Only compatible flammables are stored (no oxidizers, no reactive incompatibles).
Dispensing controls (if you transfer liquids)
- Bonding and grounding kit is available at point of use.
- Operators have been trained on bonding/grounding and slow-transfer technique.
Common install mistakes that keep showing up in the field
If you want a short list of what to fix first, it’s this:
- Cabinet placed in a corridor because it “fit there.”
- Vent plugs left loose or removed even though the cabinet isn’t vented.
- Door doesn’t fully latch because the cabinet isn’t level.
- Cabinet becomes storage for incompatible chemicals and cardboard.
- People pour solvent without bonding/grounding because “we’ve always done it this way.”
Next steps
If you’d like, send your room layout (rough sketch is fine), the liquids you plan to store, and the cabinet size you’re considering — and we’ll sanity-check placement and cabinet capacity against a practical compliance checklist.
To browse cabinet sizes and configurations first, start here: flammable safety storage cabinets.